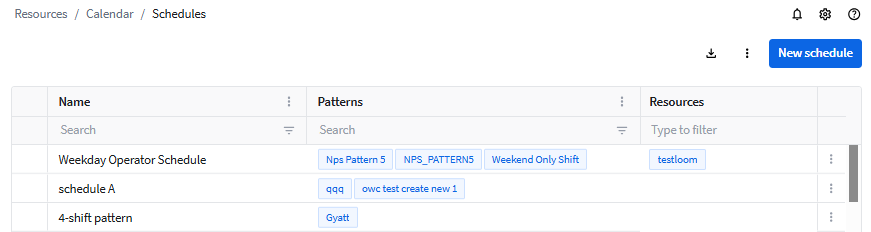
The Schedules module is part of the Calendar system (under RESOURCES). See the Calendar article for a description of the Calendar system.
A Schedule outlines the sequence of shift patterns and their start and end dates. It is possible to edit this sequence by removing shifts, adding other shifts or adding breaks.
Example: Suppose shift patterns change per season, and a new pattern always starts on the first Monday after the season changes. All these shift patterns are set up in the Schedules module, each with a start date and an end date.
When creating or editing a schedule, you see three tabs:
General: Defines the name and shift patterns that the schedule contains.
Schedule: Shows three days in the past and days in the future with the scheduled shift patterns.
Resources: Allows optionally to assign schedules to specific machines.
The Schedules module also includes Schedule settings.
General tab
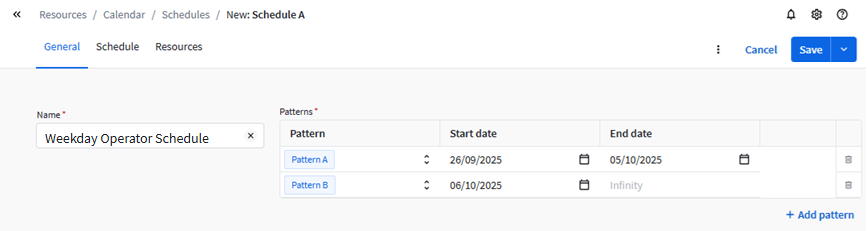
A schedule has a Name and should contains at least one pattern that defines when and how shifts are applied.
Click Add pattern to add a shift pattern.
| Pattern | Select the shift pattern to use. You can also create a New pattern from here. See the Patterns article. |
| Start date | Select from which date the shift pattern should be used. |
| End date | Select until which date the shift pattern should be used.
|
Remarks:
- When you open a schedule later, you can only delete patterns with the start date in the future and only change dates in the future.
- If changes have been made in the Schedule tab, then these changes will be lost if the Pattern, Shift date and End date in the General tab are changed.
Schedule tab
The Schedule tab visualizes the full calendar starting three days ago with all defined patterns including their start and end times. You can use this tab to edit your schedule, to mark days as non-working, to add or remove breaks and to detect and fill gaps where no shifts are defined.
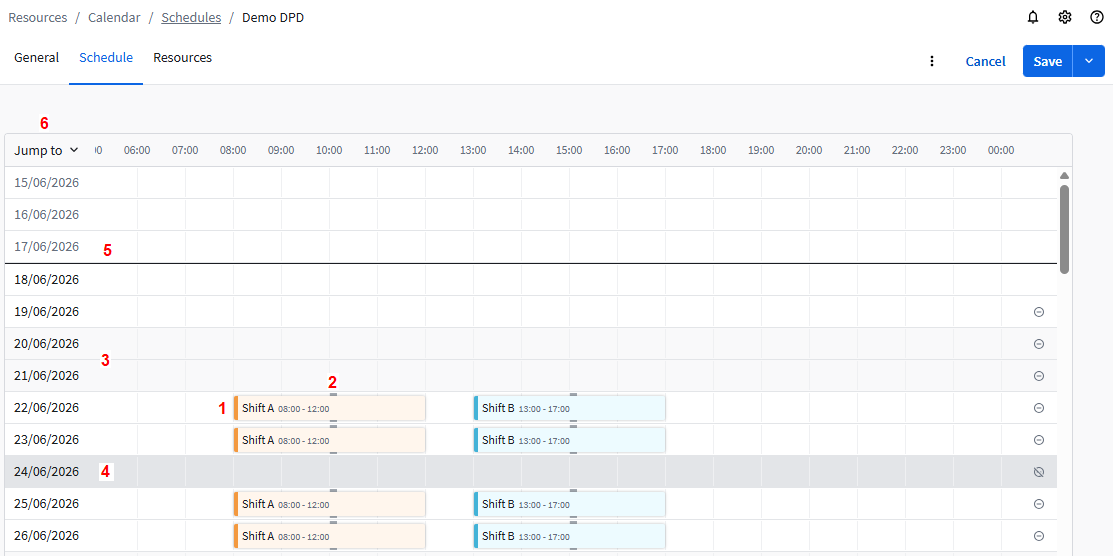
Legend:
- Shifts are shown with their name, time frame and color.
- Breaks are shown as gray lines on the borders of the shift.
- Weekends are marked with a light gray background.
- Non-working days (set via Settings, see below) are marked with a dark gray background.
- Today has a dark gray line on top.
- Click the Jump to button to see your schedule a specific date in the future.
You can do following edits for future shifts and days:
- Add a shift by hovering over a free space and clicking the + icon. Only shifts that fit the free space can be selected.

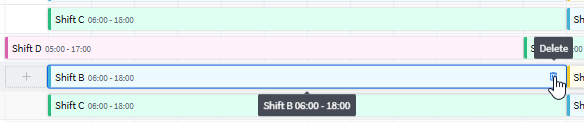
A dialog opens to select a Shift code and set the Start time and End time and optionally add Breaks. - Edit a shift by clicking it. The same dialog opens as when adding a shift.

- Delete a shift by clicking on a Delete icon
 .
.
- Mark a day as non-working by clicking the ⊝ icon on the right side.

The row will be grayed out and unavailable for shift assignment.
Mark a non-working day as working by clicking the
 icon on the right side.
 You then can add shifts.
Non-working days that are set via the Schedule settings (see further) cannot be marked as working.
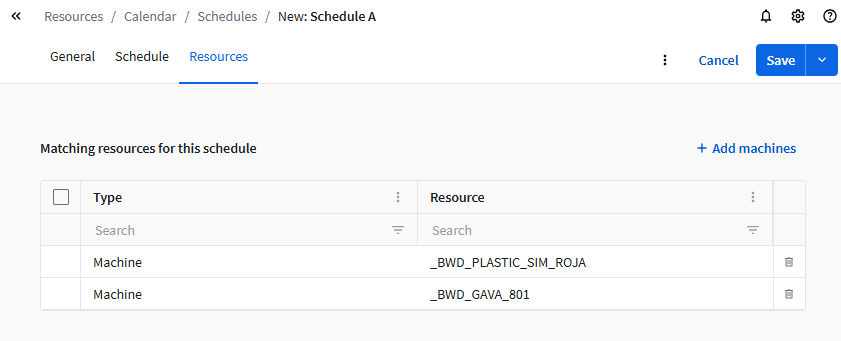
Resources tab
The Resources tab is used to optionally assign a shift schedule to specific production resources (e.g. machines).
Remarks:
- If no resources have been selected for a schedule, the schedule can be used for any resource.
- If one or more resources have been selected for a schedule, the schedule can only be used for these resources.
- A machine that is already assigned to another schedule cannot be selected again.
To add resources, click the Add machines button.
Schedule setting
The Schedule settings page defines key time-related parameters used throughout the system, including:
- Start of the year, week, day
- Non-working days (holidays)
Open the Schedule settings from the Schedules module with the  button (top right corner), and then click Settings.
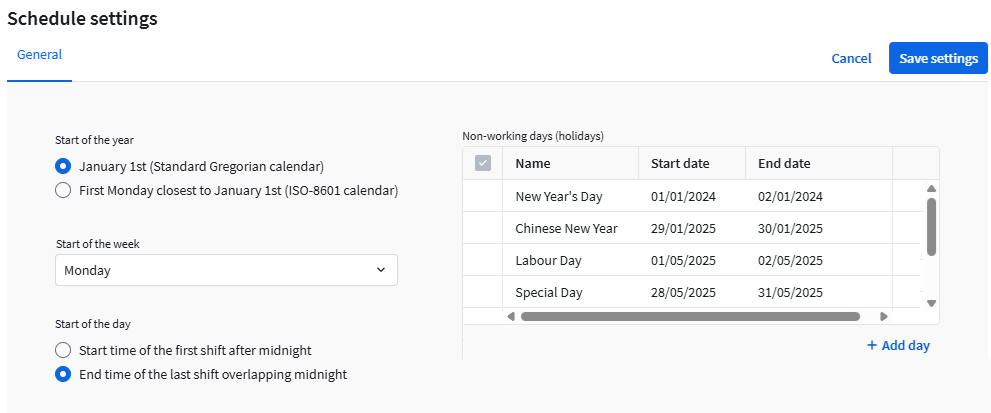
To close this dialog and save the settings, click Save settings.